|
전자부품 데이터시트 검색엔진 |
|
|
전자부품 데이터시트 검색엔진 |
|
H7CC-R11WD 데이터시트(PDF) 62 Page - Omron Electronics LLC |
|
|
|||||||||||||||||||||||||||||
H7CC-R11WD 데이터시트(HTML) 62 Page - Omron Electronics LLC |
|
|
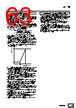
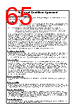
62 / 66 page  H7CC- @ 62 • When mounting the Counter to a panel, tighten the two mounting screws alternately, a little at a time, so as to keep them at an equal tightness. If the panel screws are tightened unequally, water may enter the panel. • Store the Counter at the specified temperature. If the Counter has been stored at a temperature of less than −10°C, allow the Counter to stand at room temperature for at least 3 hours before use. • Mounting the Counter side-by-side may reduce the life expectancies of internal components. • Use the Counter within the specified ranges for the ambient operating temperature and humidity. • Do not use or store the product in the following locations: • Locations subject to sudden or extreme changes in temperature. • Locations subject to oil. • Locations where high humidity may result in condensation. • Locations prone to icing. • Locations with excessive vibration or shock. • Locations subject to exposure chemicals. • Locations subject to water. • Locations subject to bugs and small animals • Do not use this Counter in dusty environments, in locations where corrosive gasses are present, or in locations subject to direct sunlight. • Install the Counter well away from any sources of static electricity, such as pipes transporting molding materials, powders, or liquids. • Internal elements may be destroyed if a voltage outside the rated voltage range is applied. • Be sure that polarity is correct when wiring the terminals. • Separate the Counter from sources of noise, such as devices with input signals from power lines carrying noise, and wiring for I/O signals. • Do not connect more than two crimp terminals to the same terminal. • Up to two wires of the same size and type can be inserted into a single terminals. • Use the specified wires for wiring. Applicable Wires: AWG 18 to AWG 22, solid or twisted, copper (Wire material: Copper) • Install a switch or circuit breaker that allows the operator to immediately turn OFF the power, and label it to clearly indicate its function. • When the Counter is operated with no-voltage input (NPN input), approximately 14 V is output from the input terminals. Use a sensor that contains a diode. • Use a switch, relay, or other contact so that the rated power supply voltage will be reached within 0.1 seconds. If the power supply voltage is not reached quickly enough, the Counter may malfunction or outputs may be unstable. • Use a switch, relay, or other contact to turn the power supply OFF instantaneously. Outputs may malfunction and memory errors may occur if the power supply voltage is decreased gradually. • When changing the set value during operation, because the H7CC uses a constant read-in system, output will turn ON if the set value is equal to the present value. • When changing the comparison value during operation, because the H7CC uses a constant read-in system, the output status will change if the comparison value is changed to a value on the other side of the present value. (when using as a tachometer) • If the set value and present value are both 0, the output will turn ON for the default setting. The output will turn OFF during a reset operation. (when using as a counter) • When the power is turned ON using the factory settings, the output will turn ON after 999.9 s if no pulses are received as count input. • Do not use organic solvents (such as paint thinners or benzine), strong alkali, or strong acids as they will damage the external finish. • Confirm that indications are working normally, including the backlight LED, and LCD. The indicator LEDs, LCD, and resin parts may deteriorate more quickly depending on the application environment, preventing normal indications. Periodic inspection and replacement are required. • The waterproof packing may deteriorate, shrink, or harden depending on the application environment. Periodic inspection and replacement are required. Precautions for Safe Use Input 0 V Sensor Diode |
|
링크 URL |
| ALLDATASHEET 가 귀하에 도움이 되셨나요? [ DONATE ] |
Alldatasheet는? | 광고문의 | 운영자에게 연락하기 | 개인정보취급방침 | 링크 투 데이터시트 | 링크교환 | 제조사별 검색 All Rights Reserved©Alldatasheet.com |
| Russian : Alldatasheetru.com | Korean : Alldatasheet.co.kr | Spanish : Alldatasheet.es | French : Alldatasheet.fr | Italian : Alldatasheetit.com Portuguese : Alldatasheetpt.com | Polish : Alldatasheet.pl | Vietnamese : Alldatasheet.vn Indian : Alldatasheet.in | Mexican : Alldatasheet.com.mx | British : Alldatasheet.co.uk | New Zealand : Alldatasheet.co.nz |
|
Family Site : ic2ic.com |
icmetro.com |
 Korean ▼
 English
 Chinese
 German
 Japanese
 Russian
 Korean
 Spanish
 French
 Italian
 Portuguese
 Polish
 Vietnamese
 Indian
 Mexican
 British
 New Zealand