|
전자부품 데이터시트 검색엔진 |
|
|
전자부품 데이터시트 검색엔진 |
|
ADP1660ACBZ-R7 데이터시트(PDF) 7 Page - Analog Devices |
|
|
|||||||||||||||||||||||||||||
ADP1660ACBZ-R7 데이터시트(HTML) 7 Page - Analog Devices |
|
|
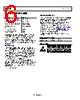
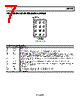
7 / 28 page  Data Sheet ADP1660 Rev. 0 | Page 7 of 28 PIN CONFIGURATION AND FUNCTION DESCRIPTIONS TOP VIEW (BALL SIDE DOWN) Not to Scale PGND SGND VIN SW GPIO EN VOUT STROBE SDA LED1 LED2 SCL 1 A B C D 2 3 BALL A1 INDICATOR Figure 4. Pin Configuration Table 6. Pin Function Descriptions Pin No. Mnemonic Description A1 PGND Power Ground. A2 SGND Signal Ground. A3 VIN Input Voltage for the Device. Connect an input bypass capacitor very close to this pin. B1 SW Boost Switch. Connect the power inductor between SW and the input capacitor. B2 GPIO This pin enables the part to function in torch mode or functions as a TxMASK input, depending on the value set using Bits[5:4] in Register 0x02 (see Table 14). When this pin is configured as a TxMASK input, the flash current is reduced to the TxMASK current programmed in Register 0x07 (for LED1) and Register 0x0A (for LED2). B3 EN Enable. Set EN low to bring the quiescent current (IQ) to <1 µA. Registers are set to their default values when EN is brought from low to high. C1 VOUT Boost Output. Connect an output bypass capacitor very close to this pin. This pin is the output for the 5 V external voltage mode. C2 STROBE Strobe Signal Input. This pin synchronizes the flash pulse to the image capture. In most cases, this signal comes directly from the image sensor. C3 SDA I2C Data Signal. D1 LED1 Current Source for LED1. Connect this pin to the anode of flash LED1. D2 LED2 Current Source for LED2. Connect this pin to the anode of flash LED2. D3 SCL I2C Clock Signal. |
|
|
링크 URL |
| ALLDATASHEET 가 귀하에 도움이 되셨나요? [ DONATE ] |
Alldatasheet는? | 광고문의 | 운영자에게 연락하기 | 개인정보취급방침 | 링크 투 데이터시트 | 링크교환 | 제조사별 검색 All Rights Reserved©Alldatasheet.com |
| Russian : Alldatasheetru.com | Korean : Alldatasheet.co.kr | Spanish : Alldatasheet.es | French : Alldatasheet.fr | Italian : Alldatasheetit.com Portuguese : Alldatasheetpt.com | Polish : Alldatasheet.pl | Vietnamese : Alldatasheet.vn Indian : Alldatasheet.in | Mexican : Alldatasheet.com.mx | British : Alldatasheet.co.uk | New Zealand : Alldatasheet.co.nz |
|
Family Site : ic2ic.com |
icmetro.com |
 Korean ▼
 English
 Chinese
 German
 Japanese
 Russian
 Korean
 Spanish
 French
 Italian
 Portuguese
 Polish
 Vietnamese
 Indian
 Mexican
 British
 New Zealand